


You can find useful information about the subsurface of any geographical area available on the Map viewer.
The user's guide primarily explains how you can :
- Display a specific geographical area
- Display cartographic layers(especially parameterized layers)
- Query of data layers
- Print maps
- Advanced functionalities (overlay, transparency, importation, annotation)
Display a specific geographical area
In brief: if you are viewing the map of a large geographical area, the tool enables you to display a map centred on the indicated location or well, with the desired increased accuracy,
- by entering the name of the commune,
- by entering the geographical co-ordinates,
- by entering the name or administrative code(s) of the well.
Display a specific geographical area
Stage 1 : Open the “Localization” tab (on left of map).
Stage 2 : Enter name of the locality (for example: commune, department).

Stage 3 : click on “Search”.
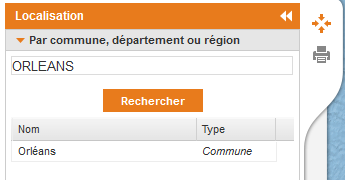
Stage 4 : Find the locality in the list and click.
The map is centered on the locality you have just indicated.
Display a geographical area using map co-ordinates
Stage 1 : open the “Localization” tab (on left of map).
Stage 2 : click on “Map co-ordinates” and enter the longitude and latitude.
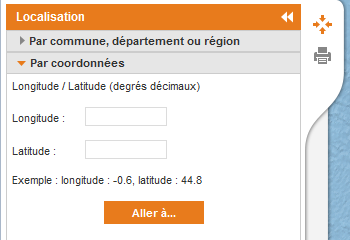
Stage 3 : click on “Go to… “
The map is centered on the locality you have just indicated.
Display a geographical area using wellsite name
Stage 1 : Open the “Localization” tab (on left of map).
Stage 2 : Click on “BEPH code or well name” and enter the administrative code or the first letters of the name.
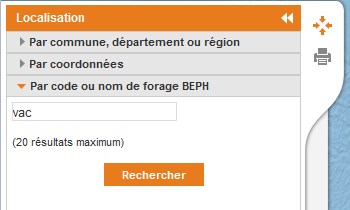
Stage 3 : Click on “Search”.
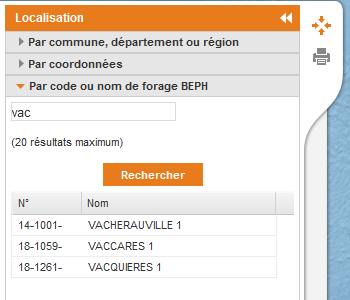
Stage 4 : Find name of well in the list and click.
The map is centered on the well site you have just indicated.
Refine the localization
To refine your localization, use the zoom and move tools at the top of map.
Manual move

- Select tool,
- Click on map, holding down mouse button,
- Move map in direction of your choice.
Zoom in

More detailed data become visible, but the area covered is smaller.
- Select tool,
- Click on map at chosen locality.
Zoom out

The visible area is larger, but the detailed data disappear…
- Select tool,
- Click on map.
Display cartographic layers (especially parameterized layers)
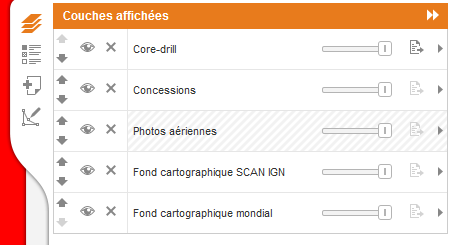
In short: beyond showing the default map, the tool allows you to display the cartographic data in a personalized way. For this purpose, you can choose whether or not to display certain data “layers”.
Display data that interest you
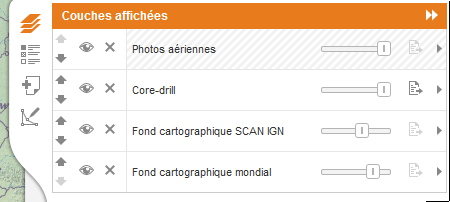
Stage 1 : Open the “Select layers” tab (on right of map).
Stage 2 : Tick the layers you wish to display.
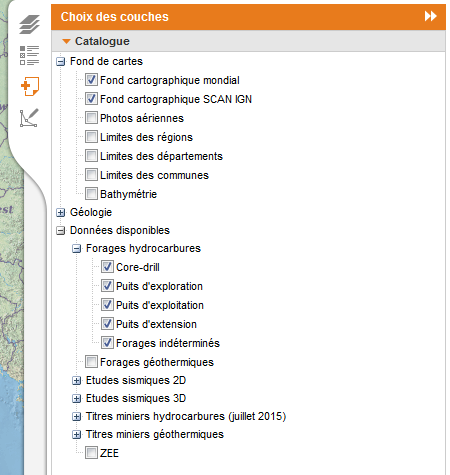
Stage 3 : The map is updated automatically.
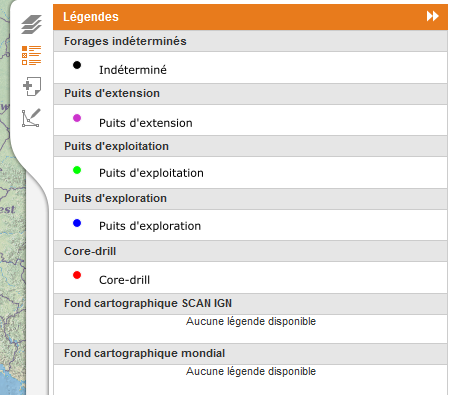
Stage 4 : The legend is available by clicking on the “Legends” tab.
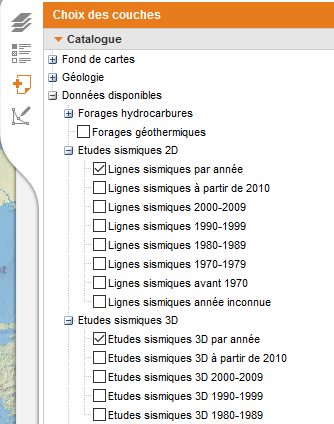
Choose among the available data
In short: the whole set of layers is presented in the form of a catalogue with items grouped into categories.
The available maps contain a very large amount of data. Some of the maps are very local (e.g. well sites) whereas others are more regional (e.g. geological data).
For this reason, it is not always possible to view on screen all the layers or the data that they contain. The data thus displayed depend on the level of zoom, i.e. the selected scale.
When the zoom level does not allow a display, the layer is grey shaded and struck out:
Example
If you choose to display an “Aerial Photography” layer over a large area (i.e. with a small map scale number), the information will not be exploitable.
Conversely, if you display the data layer over a small area (i.e. with a large map scale number), precise information will become available.
To find out more about the possibilities of data display and overlay, go to the section on advanced functionalities.
Display parameterized layers
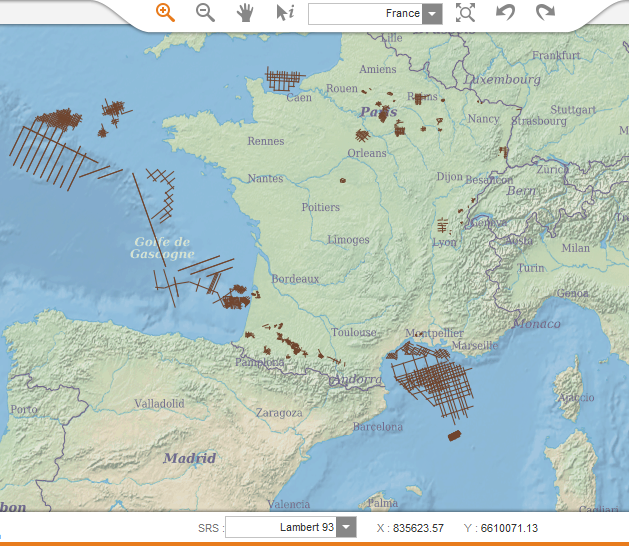
This feature allows seismic lines (or 3D seismic cubes) to appear for a specific year only (the selection being made on the end of acquisition date).
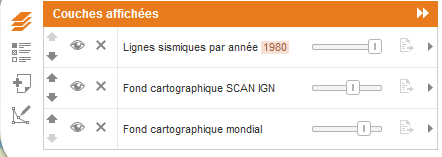
Stage 1 : Open the "Choice of Layers" tab (on the right of the map) and select the layers "Lignes sismiques par année" or "Etudes sismiques 3D par année".
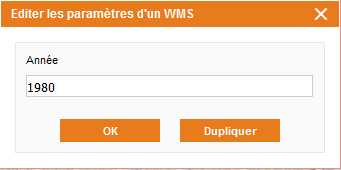
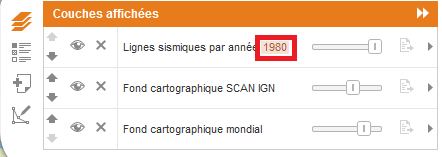
Stage 2 : Open the "Displayed Layers" tab and click on "^.* $" and enter the requested year (eg 1980).
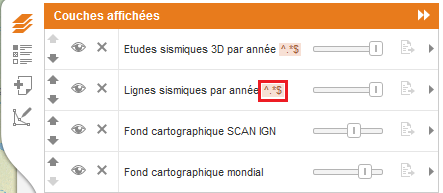
Stage 3 : The map and the "Display Layers" tab update automatically.
You can display as many desired entities by duplicating the parameterized WMS, for this click on the highlighted red term:
A new dialog box is displayed, which allows you to modify the previous search or to duplicate the WMS by choosing a new entity and clicking on duplicate:

It is now displayed 2 entities :

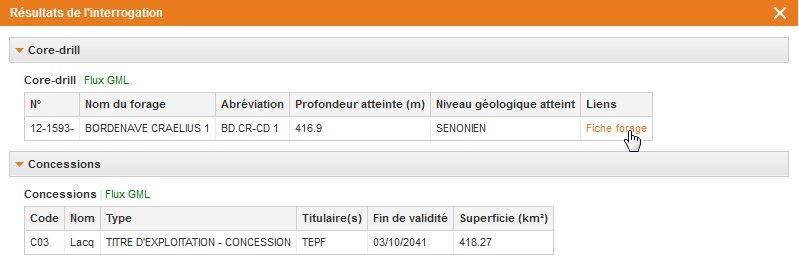
Query of data layers
With this functionality, you can access some additional data about the layers displayed on screen.
Stage 1 : Select “Layer query” (at top of map).

Stage 2 : Click on map to display available information. You can then choose the maps that interest you.
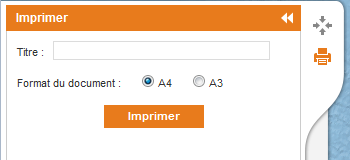
Print maps
You can print any of the maps that are displayed. For that purpose, our tool generates a document in pdf format (Portable Document Format) which you can save and print.
Stage 1 : Open the “Print current map” tab (on left of map).

Stage 2 : Give a title, choose the document format and click on “Print”.
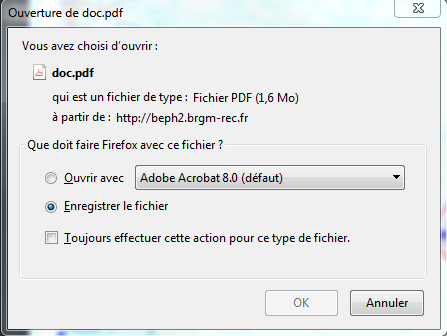
Stage 3 : Please wait for generation of the document…
Stage 4 : Save or open the document according to the options on your computer screen.
Note: this stage can differ slightly according to the computer and operating system used.
Stage 5 : Use the function for printing pdf documents installed on your computer.
Advanced functionalities (overlay, transparency, importation, annotation)
Overlay and transparency
You can superimpose several layers at the same time. For that purpose, the transparency options can be used to visualize the data of several layers.
Stage 1 : Select the layers you wish to view (see section above: “Displaying data of interest”).
Stage 2 : Click on the “Display Layers” tab.
The layers are superimposed by default, masking the information located in the lower layer.
Stage 3 : Move the cursors according to the desired level of transparency.
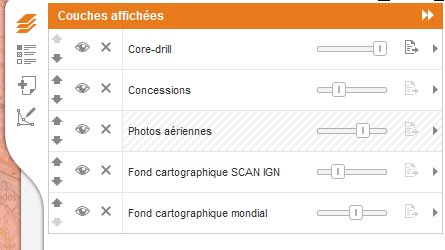
The partial transparency of the upper layers makes it possible to visualize the lower layers.
External layer procedure import
This functionality allows you to query geographical data not included on the site. To import an external layer, you need to know the URL of a distribution service (WMS service) which provides access to cartographic layers.
Stage 1 : Open the “External layers” tab (on right of map).
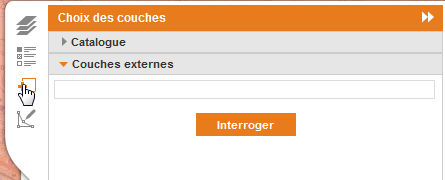
Stage 2 : Enter the URL of the WMS service and click on “Query”.
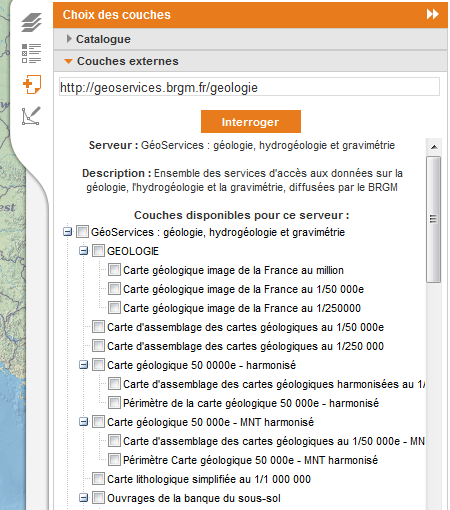
Many sites provide WMS services, for example:
- http://infoterre.brgm.fr/geoservices-ogc (link is external)
- http://www.data.gouv.fr/ (link is external)
Annotate a map
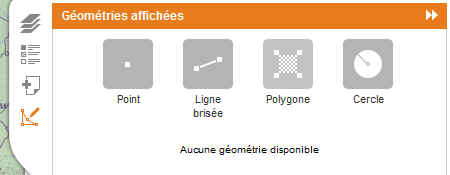
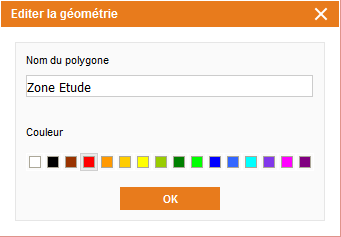
This functionality allows you to annotate your map by drawing a geometric object and retrieving it during a later session.
Stage 1 : Open the “Displayed geometry“ tab (on right of map) (You can draw a point, a line in several segments, a polygon or a circle).
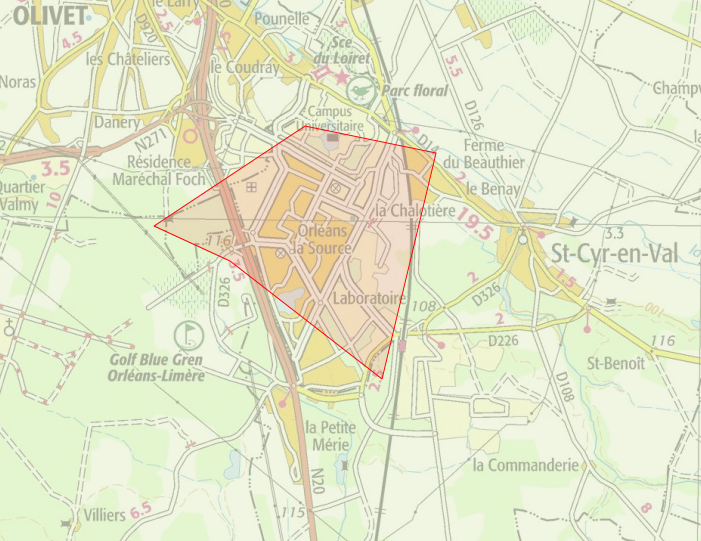
Stage 2 : Draw your annotation (here a polygon, click on each vertex).
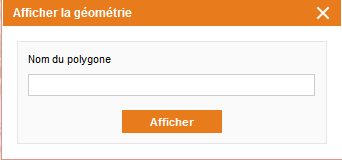
Stage 3 : Name your annotation.
Stage 4 : Find your annotation in the "Displayed geometry" tab.
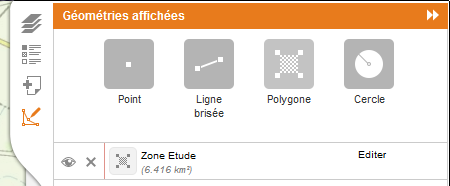
Stage 5 : Editing it will allow you to rename it or change its display color.
Dernière mise à jour le 04.05.2018